Wednesday, February 29, 2012

My Go-To Faces


Hey guys! Today I decided I'd show you one of my "everyday" makeup looks. Depending on what I'm wearing, if I don't already have some look in mind for a special occasion or outfit or something, I have three go-to makeup looks that I wear on pretty much a daily basis.

1. Red Lips (EXCEPT on lazy days, I'd say I wear this look most often)
2. Smokey Eye and nude lips (this is more of my night-time go-to look)
3. Pink lips with natural smokey eye (this is for my lazier days or days that my outfit wouldn't look right with red lips.)
I know I said three, but I do have a fourth, though I will probably never post pictures of it here, on my LAZIEST days when I just can't function, I just throw on false lashes (that are cut in half, so they look natural) and MAYBE some liquid eyeliner on top.

And yes, I do find putting on false lashes much quicker and easier than applying mascara (I also dread taking mascara off... so messy!)

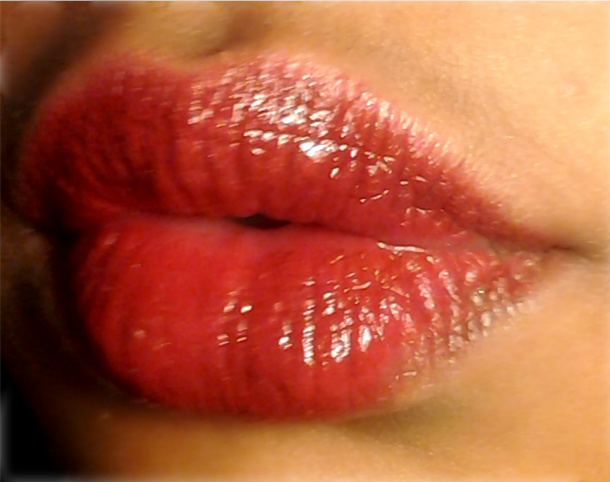
Anyway, without further ado (I have no clue how to spell that.) Here are my red lips! :*


The smokey eye I pair with red lips is a soft brown and bronze. These pictures aren't edited, I was using a public computer webcam and the light is strange. I have no black eyeshadow on at all. Just brown eyeliner on my bottom lids and black winged liquid liner on top.

I do look a bit crazy here... But this is so you can see the details better!

What do you guys think? A little old hollywood glam, if I do say so myself. (:

I'll post a tuturial on how to get the perfect red lip soon!


That's all for now!

-Kissa

Tuesday, February 28, 2012

Working With Colours (Blue)


Ahh where to begin with the colour blue... it's dreamy and beautiful yet bold and unique.
Especially on your eyes.
I decided to use blue to start showing how to turn certain "scary" colours into pretty and wearable looks because is less commonly used than greens and plums-- why not tackle the harder colours first, right? Once you can work with those big blues and oranges you'll find you can work with anything. (:

Many people think of using colours on the eyes and run away screaming at the sight of blue eyeshadow; which is very understandable!
This is NOT the easiest colour to pull off!

Many people think only certain "skin tones/colours" or even "hair colour" can wear blues, and that simply isn't true. I'd say it's more about finding the blues that work with your skin and about BLENDING that bold color with a more natural one. So don't go running for neon blues and kohl black (unless that's the look you're going for!). Take some time, expirement, and in no time you'll find a unique look you love!

Enough of my chatter. Here's the palett I used:


These blues are GORGEOUS and can be mixed and matched with the whites/silvers/dark blues to make whatever kind of blue you think matches your skin best. Along with this palette I used a deep brown (it's rare that I DON'T incorporate this color in a look), in my crease and I used black eyeshadow in the very corner.

Apply your base colour (a very light creamy colour) all over the eye, up to the eyebrow. Next apply your primary blue all over the lid. Then use a brown/bronze/black (depending on your desired look) into the crease, and smoke out the corners with any dark shade. I did not use any liner on my top lid because I don't have a lot of lid-space and I did not want the blue to not be visible when my eyes were open.

 I used black eyeshadow on my bottom eyelid and blended to the middle of the eye. I then took the darker blue, and blended that from the inner corner to the middle of the eye to meet the black shadow. Had this been a nighttime look, I would have used a black liner instead of a shadow, for darker, bolder results. (:

In case you couldn't tell, I LOVED the look! I'm not usually one to do big eye colors (My day to day goes back and fourth between red lips or a dark smokey eye and nude lips).


My Suggestions:
-Bigger, more neon blues can go well on pale skin, especially for a bolder look. In contrast, soft sky blues also are a good complement to pale skin.
-Medium skin-tones can accommodate a broad range of blues, but the "safest" to go with, I find, would be navys and steely-blues (as I used).
-Dark skin tones can work with big, bright classic blues, as well as a soft sky blue. I would avoid navys because they may come out grey-ish.

What colors have you been dying to try? Have any specific questions about your skintone? What do you think of the look? Leave a comment or contact me on twitter! (:

That's all for now!
-Kissa


Tuesday, February 21, 2012

Featured Look

Happy Mardi Gras!
I was thinking of posting a nail-polish tutorial for cool mardi gras striped nails, but as you may have read in my other post... my nails are freshly maincured so I don't wan't to mess them up just yet!

Instead, I've decided to do my first look of the week! This week I spotted this picture of Mila Kunis floating around Pinterest.com (go join the addiction!):

http://pinterest.com/pin/100134791684684413/

She is SO gorgeous! While this is more of a spring/fall outfit, I decided to try and replicate the look, but with a winter spin on it. (:

Ick! Ignore my dirty mirrors.

So Myspace 2004...

I paired a loose-fitting grey sweater with a blue, grey, and cream knit skirt. I'm wearing really low/super cheap suede boots.

Ah! I look so tired in these! But even if I didn't, I could never outdo Mila! <3
Like the look? I know I felt winter chic all day ;)

That's all for now!
-Kissa

P.S. - If you see a look that you want to duplicate or any look you want to submit to be featured let me know! (I'll link to your blog as well if you'd like). These don't just have to be pictures of you either. I'll be scouting out fashionistas (and fashionista.. boys...) that I see on the street and feature them every once in a while.

Follow me on Pinterest! -  http://pinterest.com/kissamakeup/

& on Twitter! - https://twitter.com/Kissamakeup

Monday, February 20, 2012

My Newest Obsessions

Hi guys!

While I'm usually one who tries to stay away from those kinds of trends that EXPLODE and everyone does them but you know they're short term (For example those feather hair extensions. Those came and went and I felt that they got a little over-done after a while.) I try to stick with timeless bits that can be done over and over... but this recent trend got me with...
Glitter nail polish!

Well played fashion industry.

My new obsession for this week is a particular sparkle nail polish, the colors are GORGEOUS (royal blue and royal purple). I haven't tried it on yet, but I can't wait!


Beautiful right? (:


My other obsession is wearing nail polish as a fade. Sparkle is perfect for this because it fades really well to give even beginners with their own nails an almost professional look! Take a look:

Combo: Nude nailpolish under a blue sparkle fade. Love! (:


What do you guys think about the glitter nail polish trend? Love it or can't stand it?

That's all for now!
-Kissa

Sunday, February 19, 2012

Turn Old to New!

Hey guys!

I know a lot of you are probably like me and have a lot of crushed up or old eyeshadow that you don't really plan to use again. I was cleaning through my cosmetics and before I threw the stuff away decided to see if there was any way to salvage some of it. (some of these suggestions came from makeuptalk.com <-- if you're a makeup freak like me, go join/visit!)


1. Eyeshadow to Nail Polish!

I found out online that you can take old/crushed eyeshadow, mix it with clear nail polish, and voila!: you'll have a really pretty matte nail polish!
Matte nail polish is usually more expensive than the regular kind so I thought this was so cool.
(See first attempt at the bottom!)


2. Lipstick into Lipstain!

Simply dig out the lipstick left in the bottom of the tube and put it into a pot to apply with fingers or a brush as a stain. Simple! <3

3. Lipstick to Blush!

Same instructions as before just apply to cheeks instead of lips!


4. Crushed Eyeshadow/Pigment to Packed Powder!

To restore crushed or turn loose pigments/shadows to the packed eyeshadows they once were just take some visine (eyedrops) and use a flat surface to pack them right back into their pots.
*(I've also heard you can use a couple drops of rubbing alcohol and the same instructions as above for the same results! JUST be sure not to use the eyeshadow right away, wait overnight so the alcohol will evaporate (: )

5. Eyeshadow as Lipgloss!

Take the rest of the eyeshadow, crush it into a powder, and mix it with a bit of vaseline*** (or clear gloss/chapstick) in a small pot. Voila!
***I do NOT put vaseline on my lips unless I have a moisturizer underneath. Petroleum Jelly (vaseline) is a lip/skin PROTECTOR however it sucks the moisture out of lips unless you pre-moisturize and use the vaseline to lock it in. I'll elaborate on other products to look out for in a later post! <3


That's all so far. If you guys have any creative ways to "recycle" makeup, hit me up on twitter or leave a comment! <3

That's all for now!
-Kissa


P.S. -  Here's my first attempt at eyeshadow polish! It turned out well (minus the splotches because i was rushing and didn't crush up some of the eyeshadow enough)! I didn't like the matte finish in this color (it's just a neutral plummy-brown) so I put some glittter over it and a top coat (:


Ignore my gross feet! Feet creep me out by my nails are freshly manicured so... I'll change this picture once I try it on my fingernails.
I want to try this with an old powder foundation and see if it works! It would be the perfect nude polish <3

Saturday, February 18, 2012

Marie Claire, Loft, and Rimmel London Show

A few pictures from the Front Row Fashion Show! <3

Sorry in advance that I didn't take more-- especially of the models-- but I get so caught up in watching!
There was a lot of fur,
but of course the best part about these things (other than the fashion and networking...!) is...

all the free giveaways! (:


That's all for now!
-Kissa

@kissamakeup <-- tweet tweet!

Friday, February 17, 2012

Belated Valentine's Day?

Sorry for the delay on the double-winged eyeliner post!

But I had a couple of good looks for Valentines day (or any other day you're feeling very... pink!)

Daytime-

A soft pink eyeshadow with gold shimmers. Liquid eyeliner on top, black kohl eyeliner at the bottom (including in the waterline).

Nighttime-

Take what we had before and add black shadow to the outer corners of the eye. Extend the wing and thicken the liner on the bottom and voila!


A daytime look to impress your lunch date and a nighttime look for whatever comes next. ;)

If you'd like any kinds of tutorials or steps on any of the looks I do or any looks you'd like me to do feel free to leave a comment. Also follow me on Twitter @Kissamakeup

That's all for now!
-Kissa

Gotta Thing for Double Wings


There are so many ways to do beautiful and unique double-winged eyeliner looks!

Double-wings can be a very bold statement or a nice accent depending on how you do them. I'll post the different kinds of double wings that you can do and I'll try to find ways to accomodate any eyeshape!


1.) Egyptian wings-

These double wings are the most classic! Just extend the eyeliner you put on your bottom lid and extend the eyeliner you put on your top lid. I find that it helps if you put some kind of lighter colored eyeshadow inbetween the two wings to enhance the fact that they are not connected.
My Suggestions:
-This can be used for night or day, it depends more on how you do the rest of your eyeshadow (:
-It tends to work better on eyes that have more lidspace (unlike mine) My top lid is lined pretty thin, but that is because I don't have a lot of lid-space***

***if you don't know what lid-space is, it is how creased your eye is. Many asians have very little lid-space because their eyes are very creased/hooded/lidded. The more lid-space you have the less creased your eyes are. (:


2. Fishtail


I'm calling this one the Fishtail because, of course, that's what it looks like! The difference between this and the Egyptian is that the linds are thicker and they are connected. It helps if you curve the lines up or down (rather than just doing straight wings) in order to enhance the fact that they are connected.
My Sugesstions:
-This look is a bit bolder than the previous. However, if you just do the wings and liner (no eyeshadow), and no other kind of bold makeup (like lipstick) this can be a unique day-time staple.
-These wings can be adjusted to almost any kind of eye because the lines are connected, and they can be made as thick or thin as you like.
- I actually find this look easier to do than the Egyptian! Maybe it's just me? But in case it isn't, I would definitely suggest this for beginners (:


3. The Crease

This look is not the simplest to learn, but once you do figure it out it's really easy to get the hang of! You do your eyeliner as usual (eyeliner on top and eyelner on bottom), connect the top and bottom liner to make one straight line. Then place your eyeliner pencil right on your crease and just trace the natural shape. Extend this out to the length of the previous line you made. And you're done!
My Suggestions:
-This looks best on eyes more like mine--  Creased eyes that still have a little bit of lid space. This can change the whole shape of this kind of eye, making it appear more open.
-It looks cleaner if you just use a solid line, but blends better and looks more natural if you blur/blend the line a little bit (however do NOT blend the wing tip that you extend in your corners).
-This can be adjusted to a night out and very bold, or can be a nice accent to a neutral, soft smokey eye for daytime.


That's all for now!
-Kissa <3

Thursday, February 16, 2012

All About You


From weddings, to local fashion shows, to paties-- makeup has always been a part of perfecting our greatest fantasies.

These fantasies come from not only the biggest and boldest ideas but also the clean and simple.

One of the biggest problems people come to me with as far as makeup is that they have an image of what they want in their head, but don't know how to accomplish it.
For example, I once did makeup on a bride who insisted on using turquoise somewhere on her eyes. She told me that she had gone to two other makeup artists prior and they both told her that she "couldn't" and "shouldn't" use that color and should stick to neutral. One wouldn't even attempt a look and the other didn't bother listening to what the bride really wanted and ended up doing a bold turquoise smokey eye.
I was immediately appauled! Wasn't she the bride? I understand helpful advice in a more traditional direction as far as makeup, but the one thing people need to keep in mind in ANY profession-- It's all about them, not you!

I think that you can find a way to adjust nearly any look to fit your eyes and your occasion-- you just need to know how! (By the way, I knocked it out of the ballpark for the wedding and gave the bride a beautiful neutral eye with a pop of shimmery turquoise in her inner corners (: )

So read on for some amazing looks and a lot of creativity.

That's all for now!
-Kissa

P.S.- You can follow me on Twitter @Kissamakeup